Friday, July 7, 2017

Monday, July 3, 2017
Monday, June 26, 2017
Friday, June 23, 2017
Monday, June 19, 2017
Saturday, June 17, 2017
Friday, June 16, 2017
Sunday, March 27, 2016
Happy Easter! New Spring Outfits for Dolls

I would like to wish all of my blog readers a very happy Easter! I have been very busy sewing with the extra day off that I had on Friday. I made two peplum tops, Capri pants, and a pair of shorts. I really like the peplum top pattern by Liberty Jane. The pattern calls for a zipper in the back, but instead I put a Velcro closure in the back. The Velcro closure is more kid friendly. It's easy to get on and easy to get off. Another feature that I really like about this pattern is the sweetheart neckline.
 | ||
| Grace modeling the teal peplum top and yellow Capri pants |
I made the Capri pants from the Cute and Casual pattern by Chris Lucas Designs. I chose a yellow cotton fabric. It goes well with the yellow in the top.
 | |
| Mary Ellen modeling another peplum top and shorts |
The second top was made from an aqua, pink and green floral cotton fabric. This outfit has a pair of green shorts made from the same pattern as the Capri pants. Both of these outfits are listed in my Etsy shop. Be sure to follow me on Facebook, Twitter, and sign up for my newsletter.
Friday, March 18, 2016
New Outfits for 15 Inch Dolls
I recently started adding more outfits to my 15 inch baby doll clothes line. The clothes I make are made to fit dolls such as Bitty Baby dolls. I'm hoping to increase my line of baby doll clothes and even include a whole layette set. One of the patterns that I really like is the romper dress pattern by 18 On Main. This pattern has two styles, a pleated version and a gathered version. So far, I've only made the gathered version. I love that the pattern is so versatile. There are so many possibilities with this pattern. You can find her patterns on the Pixie Faire website.
 | ||
| Peach and pink calico dress with matching headband |
 | |
| Pink and green owl print dress with white piping at the bodice |
I added white piping to the bodice in the owl print dress that is pictured above. You can do so much with this pattern. Lace to the bodice or around the bottom of the dress would be a nice addition.
 |
| Cute watermelon dress |
Sunday, January 17, 2016
Princess Seams
My latest outfit project was a sixties style dress from a pattern by Forever 18 Inches. I really like this pattern. It will be perfect for Julie and the new American Girl Beforever doll Melody who will be coming out sometime this year. I learned something that I had never done before. This dress has princess seams in the front and the back of the dress. Princess seams give a dress shape without actually having to make darts. When I first started to sew this dress, I got really confused on how to do these particular seams. I saw that the center front piece curved inward and the front side pieces curved outward. And I thought, this is never going to work! But I sat down and just started pinning one of the side pieces to the center front and I realized that what you have to do is to ease the curved part in. It also helps to hand baste the seam. If I had watched a You Tube video on it before I ever started it might have cleared things up a bit. Here is a You Tube video that I found on how to sew a princess seam. The directions would be about the same for this pattern except your seams are going to be 1/4 inch instead of 5/8 inch. The next time I make this dress, I will follow her guide and stay stitch the center front and back.
I have included a photo of the second dress that I am making by the Good Vibrations pattern. This is a picture of the front of the dress. I really like the finished look that it gives to the dress. I think that I remember my sister wearing a dress similar to this. I also love the bell sleeves. It's so sixties!

I really enjoyed making this dress. I hope that it will inspire you to try something new.
I have included a photo of the second dress that I am making by the Good Vibrations pattern. This is a picture of the front of the dress. I really like the finished look that it gives to the dress. I think that I remember my sister wearing a dress similar to this. I also love the bell sleeves. It's so sixties!

 |
| This is the wrong side of the dress. I pressed the seams in toward the center of the dress. |
 |
| Here is the final product. An orange paisley sixties style dress for 18 inch dolls. |
Thursday, December 31, 2015
Happy New Year!
On this last day of 2015, I thought that I would review what's been going on with me and my dolls. This has been a great year but it has not been a year without some sadness too. In April, I lost my dad to cancer. It really put a damper on my doll clothes business. For several months after we found out that he had cancer and that it was terminal, I just did not have a will to sew. It took a lot of joy out of everything that I did. I went on and lived my life as usual but without the joy that I used to get out of it. Anyone who has lost someone that they loved would probably understand. And then when he passed away, it took me several months afterwards to be able to get back in the swing of things. But I finally recovered and I'm ready for an even better 2016. I had 2 great craft shows this year. I usually only do the one craft show but I'm wanting to do more now. I really like being able to talk to people face to face. The Etsy shop is great but I really like to interact with live customers. But don't worry Etsy shoppers, I'm not giving up my Etsy shop anytime soon. I also love it when I get a sale with Etsy. I love to hear that little "ca-ching" that sounds on my IPAD. One thing that I got for Christmas that will really help me to stay on top of my blogging, is my HP laptop. We had an old Vista computer that was about to bite the dust. My daughter was constantly on it so instead of fighting with her for the computer, I would just wait when she wasn't on it. I also got a JoAnn's gift card from my mom so I can spend that on making plenty of doll outfits for next year. I also bought myself a new American Girl doll. I got Mary Ellen. She is so cute. I'll be sure to make lots of 50's inspired outfits. Also, be on the look out for more tropical themed outfits for the newest GOTY doll. My latest outfit is one that I just finished and listed today in my Etsy shop. It is a Red Holiday Party dress. This dress would make a great gift for Valentine's Day.
 | ||||
| My newest doll Mary Ellen |
 |
| My latest outfit Red Holiday Party Dress |
Sunday, December 27, 2015
Doll Background Tutorial
Several months ago I did a tutorial on my other blog on how to make a doll background or play set. I thought that I would post it here on this blog in case anyone missed it. I sometimes like to use these backgrounds when I take photos of my doll clothes that I sell on my Etsy shop but they are also great to use as doll rooms to play with. The great thing about these backgrounds is that you can fold them away under a bed and they don't take up a lot of space.
 First you will need a big cardboard box or one of those cardboard display boards for school projects works nice too.
 One big cardboard box will make two rooms. I just cut the tabs off and cut the box in half lengthwise.
 Then once I have my cardboard box cut, (it would probably be easier if you just used a cardboard display then you wouldn't have to cut it) I can choose some pretty pieces of scrapbook paper to use as wallpaper. You could also cover it with some Contact paper if you like.
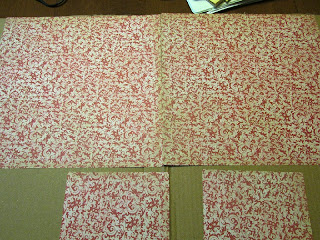 After I chose my paper, I can piece it together on my cardboard and glue it on with a glue stick. Make sure that the edges are glued down real good.

Next, I put a coordinating piece of scrapbook paper on the bottom half and glued it down. Then I made a little window at the top. I cut a scene out of a magazine and used a piece of construction paper as the window pane. I found that the magazine Southern Living has a lot of good pictures for scenery.

I hope that you enjoyed this tutorial. And maybe you might want to try one for yourself. They are really much more inexpensive than making a whole doll house.


Next, I put a coordinating piece of scrapbook paper on the bottom half and glued it down. Then I made a little window at the top. I cut a scene out of a magazine and used a piece of construction paper as the window pane. I found that the magazine Southern Living has a lot of good pictures for scenery.

 | ||
| Here's an example of the background that I made. |
 |
| And here is one of the sets that I made being used as a doll room. |
Monday, December 21, 2015
Merry Christmas
Merry Christmas!
I would like to wish all of my readers a very Merry Christmas and a joyous New Year! My family and I will be heading down to Tennessee to spend the holidays with my mom. I've got some great plans to make some more cute outfits in 2016 so be on the look out for them. Valentine's day will be coming up and I'm planning a new dress for that.


Friday, December 4, 2015
New Dresses for Christmas
 |
| They are not pictured here but I also have white gloves that go over the elbow and shoes to match. |
 |
| I call this the Ice Princess dress. |
 |
| It has a very pretty white satin ribbon belt that ties in the back. |
Sunday, August 23, 2015
Beginning Sewing Essentials

First of all, you will need something to put all of your sewing supplies in. There are so many cute sewing baskets out there to choose from. Like this cute little butterfly basket from JoAnns Fabrics.
 |
| Cute Butterfly Basket from JoAnn |
 |
| My sewing box |
Another very important item is a really good pair of scissors. These are very important to be able to cut fabric with and they need to be sharp! One thing that you don't want to do is to ever cut anything but fabric with them. If you cut paper or anything else, it will dull them or even damage them. And don't spare the expense on these. A really good pair of quality scissors will probably cost at least $30 or more. I also like a pair of small scissors to clip threads with. They can get to places on your project that the big scissors can't. My scissors are made by Gingher. Both Gingher and Fiskars are very good brands of scissors.
 |
| A pair of small scissors and my larger ones for cutting fabric. |
 |
| Seam ripper |
 |
| Fray Check to stop fraying |
pins
pin cushions or magnetic pin holders
needles to use in hand sewing
marking pens or chalk to mark symbols from patterns onto your fabric
tape measure to measure whoever you are sewing for to make sure your garment fits
hem or seam guide
various widths of elastic
thread
thread case
bobbins
bobbin case
 |
| I like a magnetic pin holder for my straight pins and a stuffed one for my needles. |
Sunday, August 16, 2015
5 Great 18 Inch Doll Fall Looks and One Free Pattern
I thought that I would share with you some of my outfits that would be great for your 18 inch doll to start to school in. All of these outfits are available in my Etsy Shop.
 |
| Cute school girl jumper and pink blouse. |
 |
| Cute green corduroy jumper and floral blouse. |
 |
| Teacher's Pet school dress |
Next is a cute green daisy print dress. Your doll will be at the top of her class in this one! This was made from a pattern by Kotton Candy Doll Fashions. You can find it on Etsy. I made a brown dotted dress from the same pattern. The final dress that I have to show you is a dress made by the Teacher's Pet School dress pattern by Kotton Candy Doll Fashions in an argyle print. Any of these 5 looks would be great for your 18 inch doll to wear on that very special first day of school.


Now I have an added bonus for you. Every doll just has to have a great backpack to start to school. And if you love to sew, you will love this free backpack pattern by Stephanie from Many Small Friends. This is such a cute backpack pattern. I just love that it has two buckles that buckle. I kind of reminds me of the book satchels that I used to carry to school way back when! You should really check her blog out! I hope that everyone has a terrific school year!
*Disclaimer- I am not affiliated in any way with the American Girl Doll company or any other 18 inch doll company.
Friday, August 14, 2015
DIY American Girl Doll House
 |
| My kitchen. We got the kitchen set from Our Generation. |
 |
| Inkpot is warming himself by the fire. |
 |
| My bathroom floor made from sample floor tiles. |
 |

 |
| This is Grace's room. |
When I got up this morning it looked like the dolls had had a party last night. Because there were red Solo cups everywhere and Inkpot was eating the pizza out of the box! I just love it when my daughter enjoys playing with her dolls.

 |
| It looks like they were playing Hungry Hungry Hippos. |
Monday, August 10, 2015
Baking With Grace: August Strawberry Lemonade Cupcakes
As you know, Grace 2015 GOTY just loves to bake and I do too! So I thought that each month Grace and I would do some baking and feature a different cupcake flavor or theme. This month's cupcake will be Strawberry Lemonade Cupcakes. They just seem to be the perfect kind of cupcake for summer. What could be better in the hot month of August than strawberry lemonade?
I also had another great helper in my kitchen, it was my daughter Emily. She also loves to bake. She read the recipe for me while I gathered the ingredients. I found the recipe for Strawberry Lemonade Cupcakes on Food.com.
Then we measured our dry ingredients and set them aside. After that, we whisked together sugar, the melted butter, and egg until smooth. (Oh and you might want to let your melted butter cool just a bit and add it slowly into the egg or you may end up with scrambled eggs!) Then add your yogurt, lemon zest, lemon juice, and lemon extract. And by the way, does anyone not know what lemon zest is? Unless you bake a lot, you may not know. The zest of the lemon is the yellow skin of the lemon. You want to use a fine grater or a lemon zester. You just want to grate the yellow part and not down to the white part of the lemon because the white part is really bitter. But you need 2 teaspoons of lemon zest and one lemon should give you that.
 |
| Grace just loves to bake in her kitchen. |
I also had another great helper in my kitchen, it was my daughter Emily. She also loves to bake. She read the recipe for me while I gathered the ingredients. I found the recipe for Strawberry Lemonade Cupcakes on Food.com.
 |
| These are the ingredients for the cupcakes. |
First of all, I had to line my muffin tin with cupcake liners. I found some pretty liners at Walmart in the Wilton baking section. I also found a neat little gadget that takes the guess work out of filling cupcakes or muffins. You just fill the little cup (included in the package) up to the top and scrape out your cake batter into the cake liners. Easy peasy and you get a perfect amount in there without your cupcake erupting over the top of your liner.
 |
| I love this gadget by Wilton! |
 |
| Here I have grated the lemon to get the zest. |
After you add that, you will beat it with a whisk attachment of your mixer until it is smooth. Now you can add your flour and mix until smooth. You don't want to over mix it. Now here is where that handy little gadget from Wilton comes in that I told you about. Scoop the batter into that and scrape it out with the little spatula into the cupcake liners. Now bake the cupcakes in a 350 oven for 22-25 minutes.
While the cupcakes are baking, you can clean up your mess first! Because you know that there will be messes. I have a feeling that Grace made some messes when she was making her cupcakes. Pssst....... I'll tell you about it later. Then after the dishes are washed, you can gather your ingredients for the frosting.
 |
| The ingredients for the frosting. |
Now I've got to tell you that my daughter Emily is so smart! As I was reading the list of ingredients, I noticed that it said to use 6 oz. of butter at room temp. Well sometimes I really have to think about measurements and equivalents really hard. It doesn't always come so easy with me. So as I was looking it up on my Ipad, she was already figuring it out in her head. She came up with the answer quicker that the internet or I could! 6 oz. of butter equals to a stick and a half or 12 tablespoons. Smart!
Well anyway, I washed the strawberries and put them in my Magic Bullet because I don't have a food processor. I'm telling you I just love my Magic Bullet! You can do a whole lot more with them than just make smoothies. Although they are very good for those too!
 |
| I used my Magic Bullet to puree the strawberries. |
 |
| And it worked great! |
Now just set those strawberries aside while you mix the egg whites and sugar. You want to heat a pan of water on the stove and get it to simmer. You want to make kind of a double boiler. Put your mixing bowl on the pan of simmering water and whisk the egg whites and sugar for about 3 minutes or until it's hot. Then put it back onto your upright mixer. Whisk this until it's cool about 6-10 minutes. Beat in the butter one tablespoon at a time until it is smooth. Now gradually beat in the lemon juice, then the vanilla.
 |
| It should look something like this. |
Now at this point, you could leave it like this and you would just have lemon frosting but if you want to, add the strawberries now. Then frost the cupcakes.
 |
| Here are my cupcakes. They are probably not as pretty as the ones on Food.com |
Now ok, I'm going give a review of this recipe. I thought that they tasted alright. They weren't bad. They kind of tasted like lemon pie. The cake part was kind of dense though. The texture was more like a muffin rather than a cupcake. And the frosting (assuming that I did it right) was not like a buttercream that I have ever tasted. I don't think that I would make these again. But they might have been better with a different kind of frosting.
Now to tell you about Grace's day of baking. While she and Saige were mixing the dry ingredients, Isabelle's cat Puff got into the flour and had flour and sugar everywhere! And then the bowls were knocked over and the eggs were all over the floor! But no worry, Puff just decided that she would lick the bowl.
Now to tell you about Grace's day of baking. While she and Saige were mixing the dry ingredients, Isabelle's cat Puff got into the flour and had flour and sugar everywhere! And then the bowls were knocked over and the eggs were all over the floor! But no worry, Puff just decided that she would lick the bowl.
 |
| Oh no Puff! What did you do? |
 |
| Puff is licking the bowl. And cupcakes are every where! |
 |
| I hope you're proud of yourself, Puff! |
Then after that disastrous day of baking, Grace decided that she needed a nap!
 |
| Grace decided to take a nap after this rough day of baking. |
Maybe next month's baking will be better! Stay tuned for September's cupcake of the month. I think it may have something to do with apples!
Subscribe to:
Posts (Atom)